
How to Make an AI Character Sheet for Consistent Images
 ReelBoop
Build an AI character sheet from a portrait. Use practical prompts, compare different views, and prepare a clear reference for your next image or video.
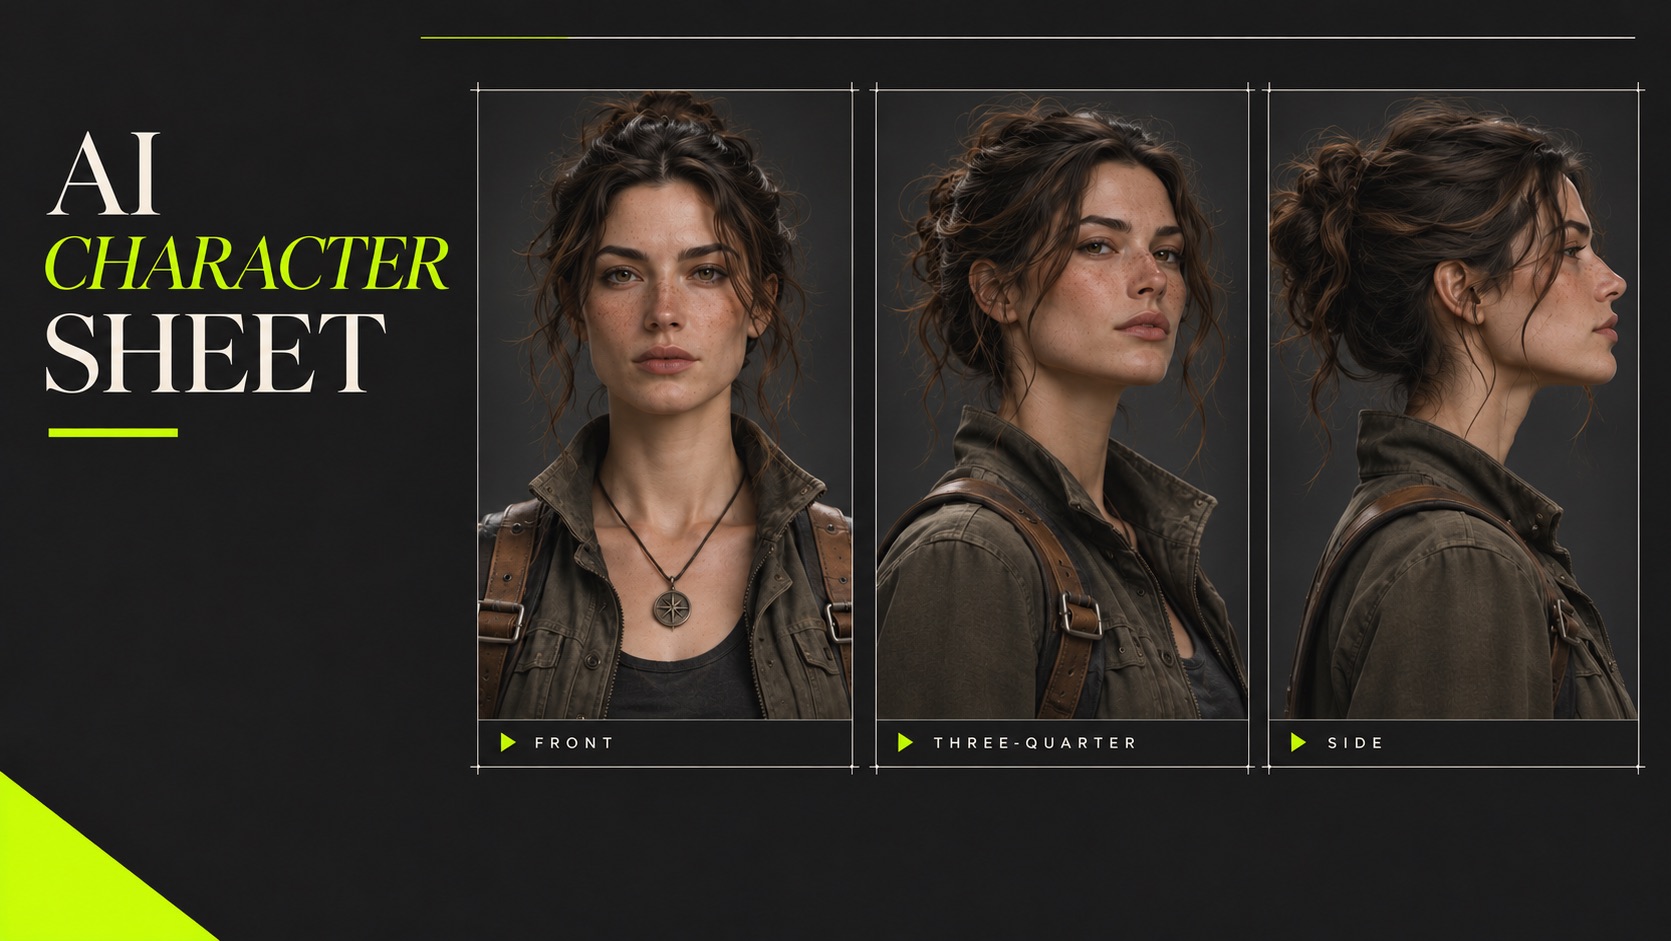
A character sheet is a set of views that describes the same person clearly enough to use as a visual reference. Start with one strong portrait, make a few controlled variations, and compare the face, hair, clothing and proportions before carrying the character into a new scene.
This guide is for creators making a recurring character for illustrations, social posts or short videos. You'll need a photo or portrait you have permission to use, a short character description and a way to compare images side by side. The prompts below are starting points; check each result because generated images can change details between views.
Choose a useful starting portrait
Pick a sharp image with an unobstructed face and even lighting. For a full-body design, include shoes, hands and the complete outfit. If you only have a headshot, use it to define the face first; the rest of the outfit is a design decision rather than a detail recovered from the photo.
Write a short reference note that separates features you want to keep from features you want to explore. For example:
- Keep: short dark curly hair, round glasses, warm brown skin and a small silver earring.
- Explore: a green work jacket, charcoal trousers and cream sneakers.
- Framing: neutral background, full body, relaxed posture.
A fictional adult character works well for planning. If you use a real person's likeness, use your own image or one you have permission to use.
Create the first character view
Open Nano Banana 2.1 in ReelBoop, add one reference image and describe the view you want. The model page lists 5 credits per 1K PNG image; check the creator for the current cost and supported upload formats before generating. This is a draft prompt you can adapt:
Use the person in the reference image as the character. Keep their facial features, short dark curly hair, round glasses and warm brown skin. Show a full-body front view, standing naturally, wearing a forest-green work jacket, charcoal trousers and cream sneakers. Neutral light-gray background, soft even studio lighting, complete figure visible with space around the feet and head.
Choose the result whose face and silhouette best match your brief. Save it alongside the original reference. The model may reinterpret small accessories or clothing; compare them rather than assuming every detail carried over.
Add side and three-quarter views
Use the selected first-view image as the reference for each additional view. Change one thing at a time: ask first for a three-quarter view, then a side view. Keep the outfit and background description consistent so a change of angle is easier to judge.
Use the reference character and keep the same face, hairstyle, glasses, green work jacket, charcoal trousers and cream sneakers. Show the character standing in a three-quarter view, head turned slightly toward the camera. Full body visible, neutral light-gray background and soft even light.
For a side view, replace “three-quarter view” with “left profile.” A side view cannot show every feature visible from the front; check the hair shape, glasses arms, clothing seams and overall proportions. If a view changes too much, return to the strongest reference and make the request more specific.
Assemble and inspect the sheet
Put your chosen images next to one another in an image editor or presentation. Label the views and keep the master portrait with them. A useful first sheet has a front view, three-quarter view and profile, plus a short list of identifying details.
| Detail | What to compare |
|---|---|
| Face | Eye spacing, nose, jaw and distinctive features |
| Hair and accessories | Hairline, silhouette, glasses and earrings |
| Outfit | Main colors, jacket shape, pockets and footwear |
| Proportions | Head-to-body scale and the length of limbs |
A sheet is a visual guide, not a guarantee that a model will reproduce a character perfectly. If hands or accessories matter to your story, check those areas at full size and keep the most reliable image as your reference.
Use the character in a scene or video
For a new image, upload the clearest view and describe only the change you want, such as a new setting or pose. Keep an explicit list of the character's important features in the prompt. See the Nano Banana prompt guide for examples of changing a scene while keeping a subject in view.
For a short video, pick the still with the framing your shot needs. A full-body image gives a dance more room to move; a chest-up portrait suits a subtle expression. Add the image to photo to video and describe a small action and camera movement. Check the resulting face and outfit across the clip before reusing a frame for another shot.
Troubleshooting
The face changes between views. Start each new view from the selected first-view image and name two or three distinctive features. Avoid asking for a new outfit and a dramatic angle in the same step.
The feet or hands are cropped. Request a complete figure with visible space around the body. Use an image ratio that gives a standing subject enough height.
The outfit changes color. Name the color and garment separately, and compare in neutral light. Keep the original image nearby as your visual source of truth.
Can I create a sheet from a text description? Yes. Generate a portrait from a detailed description first, then use the image you choose as a reference for subsequent views. You are designing a new character, so decide which generated features to keep before producing variations.