
How to Edit an Image with GPT Image 2.6
 ReelBoop
Upload one reference image, describe a focused change, choose Flare or Sunburst, then review and download your edited PNG on ReelBoop.
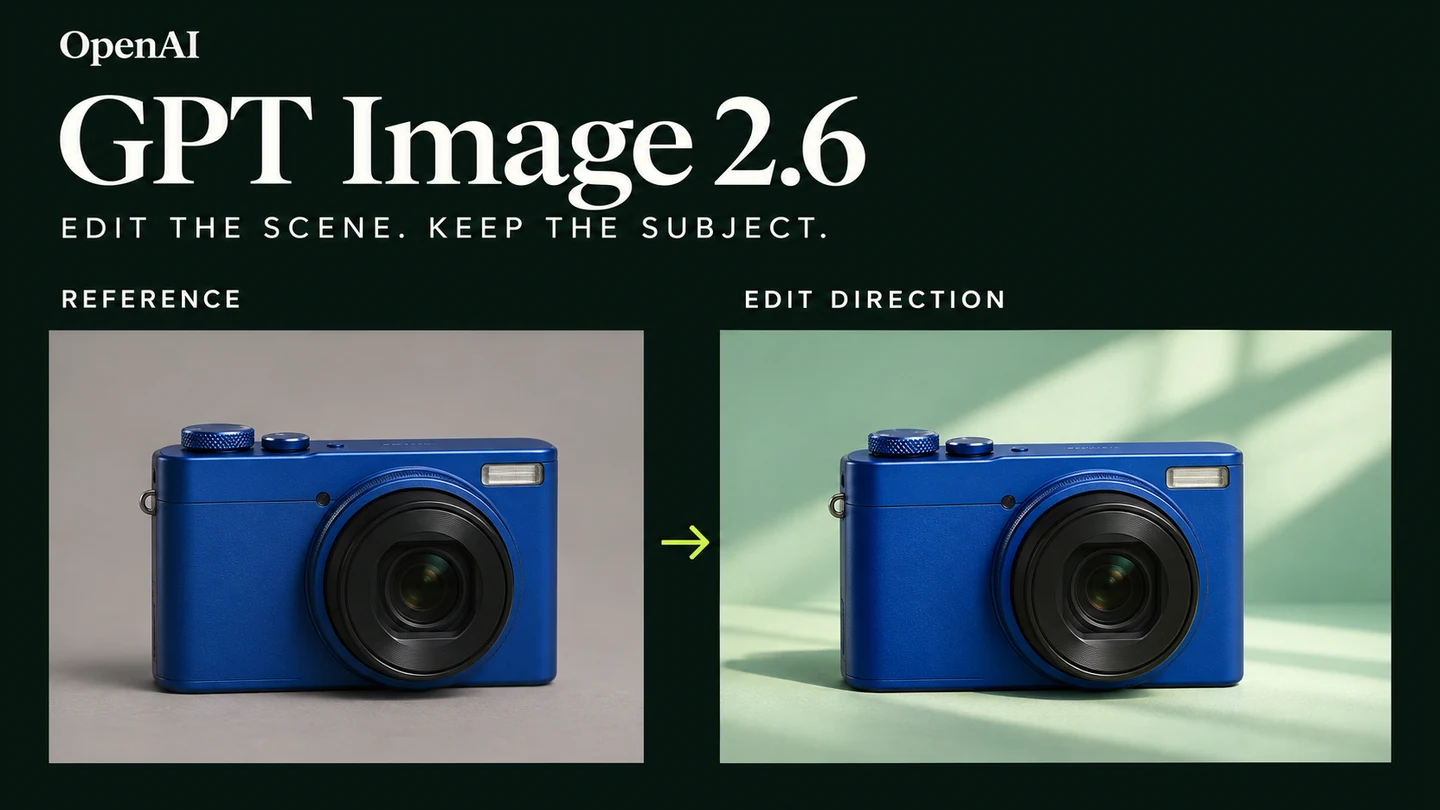
To edit an image with GPT Image 2.6, provide the image and describe two things: the change you want and the details you want to retain. For a first edit, choose a visible, focused task such as replacing a background or changing the lighting.
This guide uses a product photo as the working example. You can follow the same steps for an illustration or portrait. In ReelBoop's GPT Image 2.6 creator, Flare and Sunburst each accept one optional reference image and return one Medium-quality PNG for 5 credits. Start with a JPG, PNG or WebP up to 5 MB.
1. Choose a source image you can compare
For a product edit, use a clear photograph showing the complete object and the parts that matter: a bottle's pump, a camera's lens, or a bag's handles. Keep a copy of the original so you can compare the result against the same source.
Inspect the image at the size you plan to publish. A tiny label, a partly hidden handle or an already blurred face gives you less information to work with. Choose the clearest available source before adding a complicated scene description.
Decide what counts as a successful edit. For a camera on a new studio background, the target might be a pale green setting, a believable contact shadow and a camera whose visible controls still match the source. Write those checks down before generating.
2. Name the change and the details to retain
Separate the brief into three parts: the subject, the requested change and the supporting light or composition. Keep the important details close to the beginning.
For a blue camera photograph, try:
Edit the reference photo of the blue camera. Keep the camera's blue casing, lens, buttons, visible proportions and three-quarter angle. Replace the background and surface with a pale green studio setting. Use soft light from the upper left and a gentle contact shadow beneath the camera. Keep the complete camera visible and leave open space above it.
Adapt the color, object and viewpoint to your actual source. If your image shows the front of a bottle, asking to retain its three-quarter angle introduces an unnecessary conflict.
The form allows up to 600 characters. Use that space for decisions the image needs to express. A long string of praise such as “beautiful, perfect, premium” gives you little to inspect afterward.
3. Choose the model and output ratio
Open the GPT Image 2.6 tool, select Flare or Sunburst, and add your reference using the image upload control.
OpenAI positions Flare around fast iteration and Sunburst around detailed visual work and editing. For the full choice, see Flare vs Sunburst, which separates that positioning from ReelBoop's shared output settings. OpenAI's release explanation
Choose 1:1, 16:9 or 9:16 according to where the image will be used. For a background-only revision, a ratio close to the source gives you a simpler comparison. If you choose a wider or taller format, explain where the complete subject should sit and where you want extra space.
4. Generate, then open the completed image
Check the selected model, ratio, reference preview and 5-credit quote. Submit the edit. ReelBoop sends confirmed image tasks to My creations, where you can follow progress and open the completed image.
Compare the result at full-image size first. Is the requested background present? Does the lighting fit the subject? Is the composition useful for the intended crop?
Then zoom in. A pleasing overall impression can hide a changed button, a missing seam or a warped letter. Judge the changed scene and the retained subject separately.
5. Review the details that define your subject
For the camera example, compare these areas with the original:
- Silhouette and scale: the body, lens and grip should still describe the same camera.
- Construction: inspect buttons, seams and connections one at a time.
- Color and material: check whether the blue casing and surface finish still fit the source.
- Text: read any visible label or lettering at the size it will appear.
- Edges and shadow: inspect narrow gaps, the bottom edge and contact with the surface.
For a portrait, use equivalent checks for facial features, hair, clothing and hands. For an illustration, compare the character's identifying shapes and colors. Select the checks that matter to the actual subject.
6. Make the next edit a single decision
If the background works but the crop feels tight, make the next request about framing. If the camera details changed, return to the original source and simplify the scene request.
To continue from a completed image on ReelBoop, download it and upload that file as the next reference. Each new generation uses the selected model's displayed credits. Keep both the original source and the intermediate result so you can choose which one gives the next edit the clearest starting point.
A focused second instruction could be:
Use this image as the reference. Keep the camera, pale green background and lighting. Reframe the complete camera slightly lower in the composition, leaving more open space above for a headline. Keep the visible camera details and the gentle contact shadow.
Review the whole subject again after that edit. A request to retain detail gives the model direction; your comparison decides whether the result is usable.
Common editing problems
The new background changes the product too
Return to the original photograph. Name the visible parts you need, reduce the scene to one surface and one background, and make one main change. For exact sales imagery, use the original product photo as the reference throughout your review.
The subject is cropped after changing the ratio
Choose the intended ratio before submitting and ask for the full subject with clear margins. Reconsider the placement if a tall object has to fit a short, wide frame.
Small text or fine components differ
Read and inspect those areas directly against the source. Exact packaging, dimensions and required copy need a checked original or a controlled edit in your design workflow. Add final advertising text in an editor when you need precise wording and placement.
Once the image passes your checks, download the PNG from My creations. For more starting ideas, use the GPT Image 2.6 prompt collection; for a finished product photograph, continue to the product video prompt guide.