
Nano Banana 2.1 Prompts: Make a Small Visual Series
 ReelBoop
Use six Nano Banana 2.1 prompt recipes to create an anchor image, change its setting, reframe it and plan a visual series with one reference at a time.
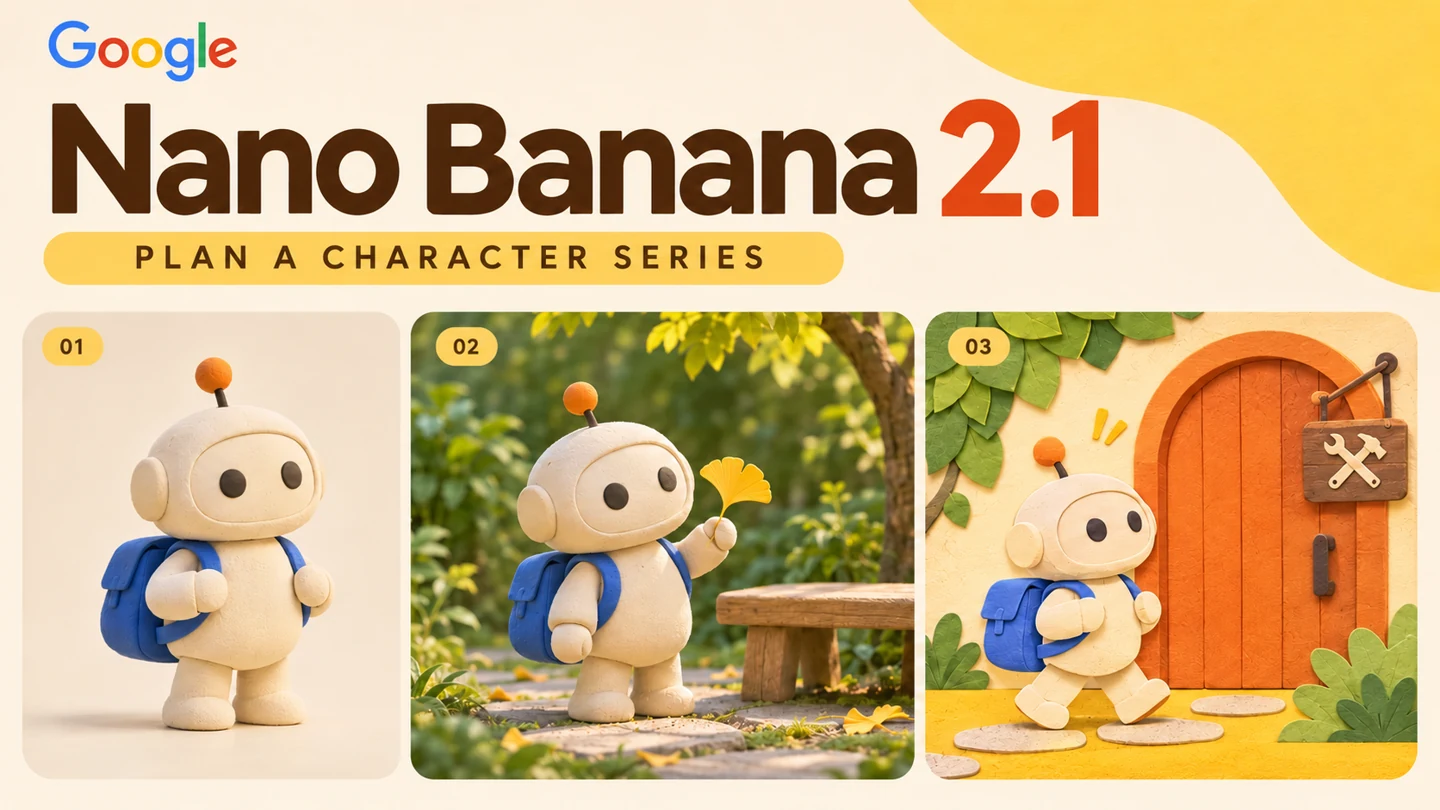
For a visual series, start with one recognizable subject and change its surroundings deliberately. A compact Nano Banana 2.1 prompt should explain the subject's identifying details, the change for this image and the composition you need.
The six recipes below follow one small robot mascot from an anchor image into different scenes and treatments. You can replace it with your own subject. Each pairs a creative brief with a useful adjustment and a visual check.
Google describes Nano Banana 2.1 as an image-generation and conversational-editing model. Google's model documentation In ReelBoop's Nano Banana 2.1 creator, the workflow produces one 1K PNG for 5 credits, with 1:1, 16:9 or 9:16 and one optional reference image.
Define an anchor before planning the series
Choose three or four features that make the subject recognizable. For this example, those are a cream rounded body, two dark circular eyes and a cobalt-blue backpack. The scene can change while those details remain the comparison points.
If you already have a subject image, start from that image and describe its actual features. If you are inventing a character, generate an anchor first, inspect it, then use your chosen result as the reference for later images.
Keep your source file and a short written description together. When a later edit changes the design too much, the original gives you a clearer starting point than a long chain of altered images.
1. Create the anchor image
Begin with an uncomplicated view that reveals the subject's outline and defining parts.
Create a character concept of one small friendly robot with a rounded cream body, two dark circular eyes and a cobalt-blue backpack. Full-body three-quarter view on a warm light-gray studio surface. Soft daylight, clear simple shapes and a subtle handmade clay texture. Leave space around the whole robot so its body and backpack are easy to inspect.
Adjust: change the material or body color before adding a busy environment.
Inspect: count the limbs and look at how the backpack joins the body. Choose an anchor whose construction you can recognize in another view.
2. Move the subject into a new setting
Upload the chosen anchor, then give it one small action and a readable environment.
Use the reference robot as the main character. Keep its rounded cream body, two dark circular eyes, cobalt-blue backpack and clay-like texture. Place it beside a low wooden bench in a small garden, holding one yellow leaf. Full-body view, soft morning light and a gently blurred green background. Keep the robot large enough to recognize.
Adjust: change the garden to a quiet station platform, keeping the character description stable.
Inspect: compare the body shape, eye spacing, backpack and material with the anchor. The new setting should help tell the story without hiding the subject.
3. Reframe for a different use
Change the selected ratio in the tool, then explain where the subject should sit inside that frame.
Use the reference robot and retain its face, cream body, blue backpack and material. Create a wide composition with the complete robot in the right third, standing on a simple warm-gray floor. Keep the left half quiet and open for a heading. Soft side light and a gentle contact shadow, with a pale blue background.
Adjust: for a tall social image, choose 9:16 and place the complete character in the lower half with open space above.
Inspect: check the final crop with your real text in place. Confirm that the backpack and feet remain visible and that the subject has enough contrast against the background.
4. Change the visual treatment
A style change needs a new material description and a small set of identity details to retain.
Reimagine the reference robot as a layered paper-cut illustration. Retain the rounded cream silhouette, two dark round eyes and cobalt-blue backpack. Show the complete character facing slightly left against a pale peach field. Use simple cut-paper shapes, lightly raised edges and soft paper shadows, with an uncluttered composition.
Adjust: change the background palette while keeping the paper treatment.
Inspect: decide whether someone could recognize the same character through the change in medium. Compare its outline and feature placement, then look at whether the layers read as paper.
5. Give a campaign image a clear hierarchy
Decide which area belongs to the picture and which belongs to final copy.
Use the reference robot in a cheerful campaign image about a first day at a new workshop. Keep its cream body, round dark eyes and blue backpack. Place the complete robot beside one large orange door in the lower half of the composition. Use bold simple shapes and soft daylight. Leave a calm ivory area above for a headline added later.
Adjust: change the door color to fit your campaign palette.
Inspect: test the real headline at its final size, then check whether the door and character still have a clear visual relationship. Add exact wording and typography in your design editor.
6. Plan a short story in one image
For early story planning, a small panel grid can help you compare poses and sequence. This request makes one image containing four panels.
Create one four-panel storyboard in a 2-by-2 grid using the reference robot. Keep the cream body, dark circular eyes and blue backpack consistent. Panel 1: the robot notices a yellow leaf. Panel 2: it picks up the leaf. Panel 3: it carries the leaf to a bench. Panel 4: it places the leaf on the bench and smiles. Simple readable poses, soft flat colors and the same small garden throughout.
Adjust: simplify the action if the pose differences are hard to read.
Inspect: count the panels, check their reading order and compare the character across all four. Use the sheet to plan; prepare separate finished images when your project needs individual frames.
Make each new version answer one question
A coherent set does not require every image to have the same background. It needs a clear idea of what connects the images. Pick the continuity you care about: the subject's design, the color system, the illustration treatment or a repeated camera distance.
Change one of those decisions at a time. If the subject's shape changes while you are testing a background, return to the anchor and shorten the scene request. If the scene works but the character is too small, change framing before adding more props.
On ReelBoop, each generation returns one PNG. Review and download your selected image in My creations, then upload it as the next reference when you want to continue from that version. Keep the original anchor available alongside the new files.
Choose the right next step
For real merchandise, start from an actual product photo and check its visible details; the product photography guide explains useful lighting and composition choices. For a general reference-editing method, read how to write a focused image edit.
Ready to make the first image? Open Nano Banana 2.1, choose the ratio for your intended use and begin with an anchor you can compare in every later frame.