
AI Video Camera Movement Prompts: 7 Copyable Examples
 ReelBoop
Choose the right camera movement, copy a prompt, and check the result. Includes pan versus slide and frames from a real Kling 3.0 Pro push-in.
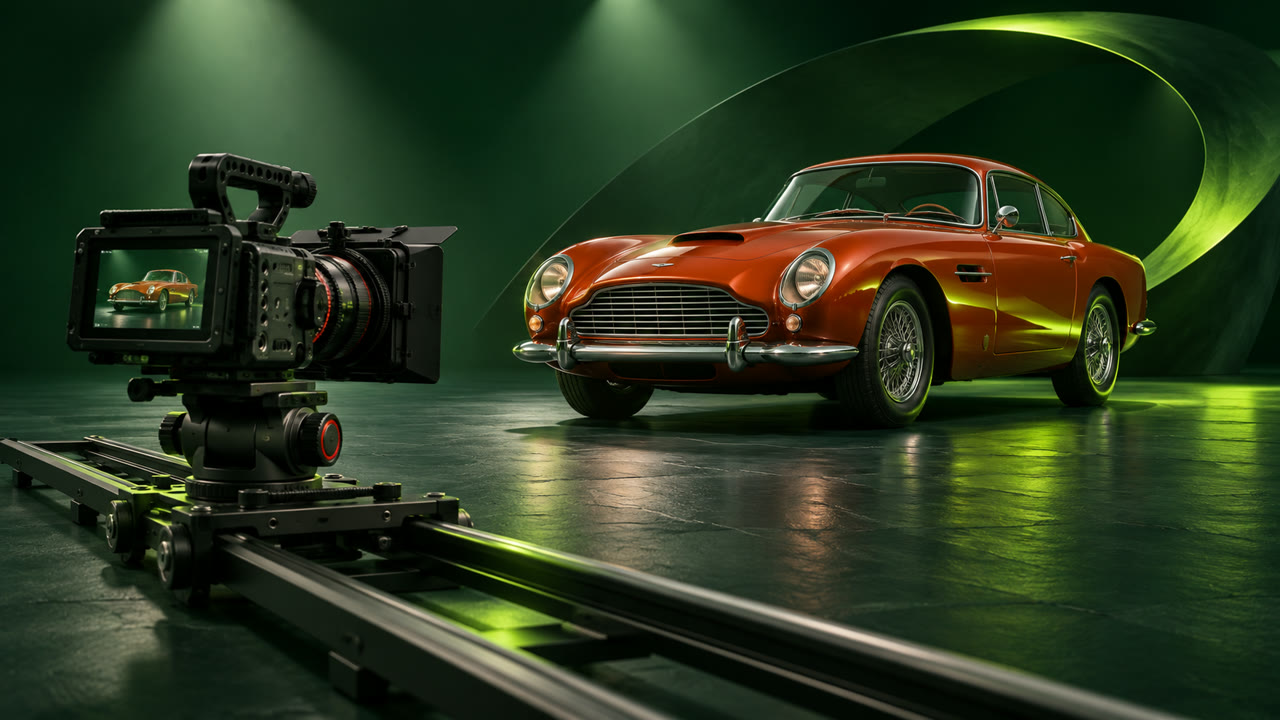
An AI video camera prompt should tell the camera where to start, how to move, and what should be in view at the end. Start with one camera instruction and give the subject at most one action. From a still, the photo supplies the scene. Put your prompt space toward the movement you want to see. Runway's image-to-video prompting guide
Choose the move by what you want to show
| What the viewer needs to see | Camera instruction | Starting image |
|---|---|---|
| A clear action in one place | Lock the camera | Room for the subject to move within the frame |
| A detail on the front of an object | Slow push-in | The whole object with a little space around it |
| Something to one side | Pan | A wide view with a recognizable endpoint |
| Something above or below | Tilt | A clear vertical feature, such as a lamp or doorway |
| Depth between two objects | Slide sideways | A nearby object in front of something farther away |
| A walking subject at a steady distance | Track alongside | A side view with space ahead |
| A new angle on a still subject | Small orbit | A subject with a readable shape and space around it |
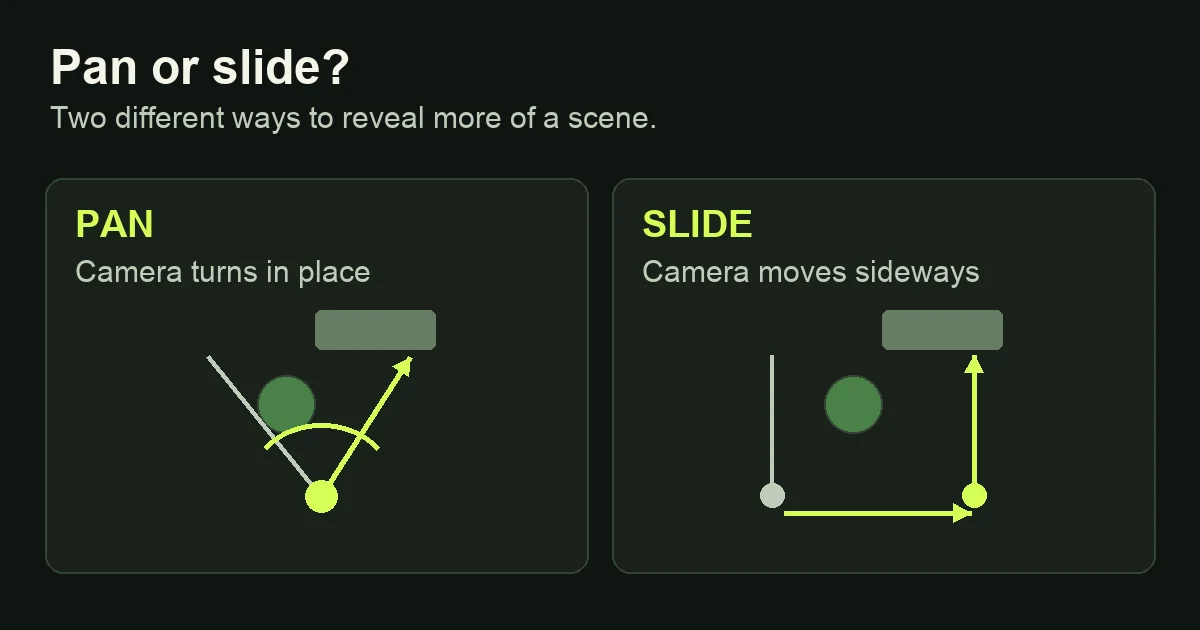
A pan turns the camera from one spot. A slide moves the camera sideways, which changes how foreground and background objects line up. A push-in moves the camera closer. A zoom-in narrows the view from the same position. Use the words for the move you want, then describe where it should end. Runway's camera movement guide
See a slow push-in from Kling 3.0 Pro
Compare the opening frame and a frame near the end of this five-second ReelBoop example. The blue camera occupies more of the frame at the end. Check the lens and top controls as well as the crop. Those details help you spot a shape change that a closer view alone might hide.
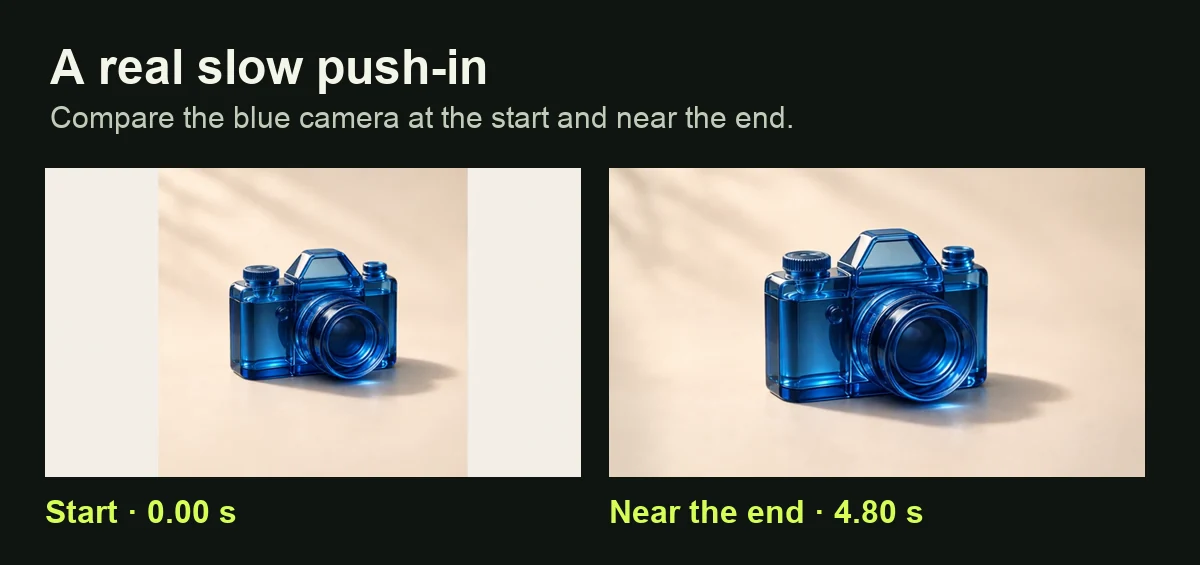
This was the prompt for that clip. You can watch the full result and see the exact starting photo on the Kling 3.0 Pro model page.
A very slow camera push toward the blue camera. Keep its shape stable. Soft studio light, no cuts.
Seven prompts for framing and camera movement
Replace the objects and framing with details from your own starting image. Each example includes something specific to look for in the take.
1. Locked camera for a hand or object action
Locked camera at counter height in a medium side view. A hand sets the ceramic cup on the counter and withdraws. The cup rests near the center and the background stays steady.
Check: compare the counter edge before and after the cup lands. If the frame drifts, make “locked camera” your only camera instruction.
2. Slow push-in to show a detail
The desk lamp begins fully in view at eye level. The camera moves forward slowly toward the lamp and ends on the brushed metal rim. The lamp stays in place.
Check: the rim should be clearly visible when the camera stops. If it gets cut off, ask for a medium close-up or use a wider starting photo.
3. Pan right to reveal the next part of a scene
Pan slowly right from one fixed point at eye level. Start on the workbench and stop with the blue door centered. Keep the horizon level throughout the turn.
Check: the view turns once and lands on the door. Use a source that already shows the edge of the door if its appearance matters.
4. Tilt up to reveal height
From a fixed camera position, begin on the base of the floor lamp. Tilt upward along the stem and stop with the shade in the upper half of the frame. The lamp and room stay still.
Check: follow the line of the stem during the tilt. If it bends or changes length, start with more of the lamp in view and shorten the tilt.
5. Slide sideways to show depth
At table height, slide the camera slowly to the right. The near plant leaf drifts past the left edge of the frame as the book on the table comes into view. End with the book centered.
Check: the foreground leaf should shift faster across the frame than the background. If both move together, try a source with more distance between them.
6. Track alongside a moving person
Track left to right beside the person as they walk along the brick wall. Keep the same waist-up side view and match their pace. Finish while they are still walking in the same direction.
Check: keep the face, shoulders, and direction consistent. If the camera overtakes the person, ask for fewer steps at an even pace.
7. Orbit for a three-quarter view
Start on a front view of the speaker at tabletop height. Move in a short arc to the right and stop at a front three-quarter view. The speaker stays still throughout the arc.
Check: look at the grille, corners, and newly visible controls. If exact details on that side matter, start from a real three-quarter photo and use a smaller move.
Improve the next take with one change
Open Kling 3.0 Pro on ReelBoop, add a starting photo, choose the ratio, and check the quote. This ReelBoop workflow makes a five-second silent clip. Watch it once at normal speed. Then compare three points: the opening crop, the movement in the middle, and the closing composition.
If the request was “cinematic reveal” and the shot wandered, replace it with a starting position and one visible endpoint, such as “pan slowly right from the workbench and stop with the blue door centered.” Keep the same image for the next take. If your idea needs two different camera moves, give each one its own shot in the storyboard template.